第十三章:网络
第十三章:网络
QtQt QuickQML
https://gist.github.com 来访问。我在下面https://gist.github.com/jryannel/7983492 创建了这个gist的小例子。它会显示一个绿色小框。因为gist的URL将会为浏览器提供HTML编码,所以需要在URL后面添加/raw来检索原始文件而不是HTML代码。
// GistExample.qml
import QtQuick

Loader {
    id: root
    source: 'https://gist.github.com/jryannel/7983492/raw'
    onLoaded: {
        root.width = root.item.width  // qmllint disable
        root.height = root.item.height  // qmllint disable
    }
}
// GistExample.qml
import QtQuick
Loader {
id: root
source: 'https://gist.github.com/jryannel/7983492/raw'
onLoaded: {
root.width = root.item.width // qmllint disable
root.height = root.item.height // qmllint disable
}
}想从RemoteComponent.qml来通过网络加载另一个文件,需要在服务端的相同文件路径下创建一个专门的qmldir文件。完成后,就可以通过名称来引用组件了。
http://localhost:8080/main.qml#1234),这里的‘#1234’ 就是URL参数段。HTTP服务总提供相同的文档,但QML将会使用整个URL(包括参数段)来缓存文档。每次访问URL时,参数段需要重新生成,这样QML才不会取到缓存值。参数段可以是当前以毫秒格式时间或随机数。
Loader {
    source: 'http://localhost:8080/main.qml#' + new Date().getTime()
}
Loader {
source: 'http://localhost:8080/main.qml#' + new Date().getTime()
}总的来说,模板可以使用,但真的不推荐,因其没有发挥QML的真正能力。较好的实现方式是使用提供JSON或XML格式数据的web服务。
https://flask.palletsprojects.com) ,一个基于pythonr的简单HTTP应用服务,来创建一个简单的颜色服务。你也可以使用其它服务来接收和返回JSON数据。思路是假定有一组可以通过web服务来进行管理的,已命名的颜色。这里,可管理意味着CRUD(create-read-update-delete)。
在Flask,简单的web服务可以写在一个文件里。我们先从server.py文件开始。这个文件里,我们创建代码来从外部JSON文件加载初始颜色。参见Flask快速开始文档。
from flask import Flask, jsonify, request
import json

with open('colors.json', 'r') as file:
    colors = json.load(file)

app = Flask(__name__)
# Services registration & implementation...if __name__ == '__main__':
app.run(debug = True)
from flask import Flask, jsonify, request
import json
with open('colors.json', 'r') as file:
colors = json.load(file)
app = Flask(__name__)# Services registration & implementation...if __name__ == '__main__':
app.run(debug = True)当运行此脚本,会在http://localhost:5000 创建web服务,但不提供啥有用的服务。
现在就要在我们的服务中加入CRUD (Create,Read,Update,Delete) 服务节点。
http://localhost:5000/colors ’)。第三个参数是可选的,是将传给服务的JSON数据。最末的参数定义了当返回响应时调用的回调函数。在发送请求前,要通过修改请求头来指明请求和接收JSON格式的数据。
使用这个请求帮助函数,可以实现我们之前定义的简单命令(create, read, update, delete)。以下是服务实现中的代码。
function getColors(cb) {
    // GET http://localhost:5000/colors
    request('GET', null, null, cb)
}

function createColor(entry, cb) {
    // POST http://localhost:5000/colors
    request('POST', null, entry, cb)
}

function getColor(name, cb) {
    // GET http://localhost:5000/colors/${name}
    request('GET', name, null, cb)
}

function updateColor(name, entry, cb) {
    // PUT http://localhost:5000/colors/${name}
    request('PUT', name, entry, cb)
}

function deleteColor(name, cb) {
    // DELETE http://localhost:5000/colors/${name}
    request('DELETE', name, null, cb)
}
function getColors(cb) {
// GET http://localhost:5000/colors
request('GET', null, null, cb)
}
function createColor(entry, cb) {
// POST http://localhost:5000/colors
request('POST', null, entry, cb)
}
function getColor(name, cb) {
// GET http://localhost:5000/colors/${name}
request('GET', name, null, cb)
}
function updateColor(name, entry, cb) {
// PUT http://localhost:5000/colors/${name}
request('PUT', name, entry, cb)
}
function deleteColor(name, cb) {
// DELETE http://localhost:5000/colors/${name}
request('DELETE', name, null, cb)
}在UI里我们使用这个服务来实现命令。有一个id为gridModel的ListModel列表模型,为视图GridView来提供数据。使用UI元素Button来确认命令。
直接引入服务:
import "colorservice.js" as Service从服务端读取颜色列表:
Button {
    text: 'Read Colors'
    onClicked: {
        Service.getColors(function(response) {
            print('handle get colors response: ' + JSON.stringify(response))
            gridModel.clear()
            const entries = response.data
            for(let i=0; i
在服务端新建一个颜色条目:
Button {
    text: 'Create New'
    onClicked: {
        const index = gridModel.count - 1
        const entry = {
            name: 'color-' + index,
            value: Qt.hsla(Math.random(), 0.5, 0.5, 1.0).toString()
        }
        Service.createColor(entry, function(response) {
            print('handle create color response: ' + JSON.stringify(response))
            gridModel.append(response)
        })
    }
}
以颜色名来请求一个颜色:
Button {
    text: 'Read Last Color'
    onClicked: {
        const index = gridModel.count - 1
        const name = gridModel.get(index).name
        Service.getColor(name, function(response) {
            print('handle get color response:' + JSON.stringify(response))
            message.text = response.value
        })
    }
}
在服务器上基于名称来更新颜色条目:
Button {
    text: 'Update Last Color'
    onClicked: {
        const index = gridModel.count - 1
        const name = gridModel.get(index).name
        const entry = {
            value: Qt.hsla(Math.random(), 0.5, 0.5, 1.0).toString()
        }
        Service.updateColor(name, entry, function(response) {
            print('handle update color response: ' + JSON.stringify(response))
            gridModel.setProperty(gridModel.count - 1, 'value', response.value)
        })
    }
}
通过颜色名称删除颜色:
Button {
    text: 'Delete Last Color'
    onClicked: {
        const index = gridModel.count - 1
        const name = gridModel.get(index).name
        Service.deleteColor(name)
        gridModel.remove(index, 1)
    }
}
使用REST API实现的CRUD (create, read, update, delete) 至此结束。还有其它方法来生成web服务API。可以是基于模块的,每个模块有一个服务节点。而API可以使用JSON RPC来定义(http://www.jsonrpc.org/) 。当然基于XML的API也是可以的,但JSON方式更有优势,因为JSON解析已经作为JavaScript的一部分内建到了QML/JS里。
http://oauth.net/
Spotify API集成OAuth的例子,这个例子混合使用了 C++ 类和QML/JS。关于更多集成细节,参考《Qt C++ 》一章。
此应用程序的目标是向经过身份验证的用户展示检索最受欢迎的前十位艺术家。
Spotify Developer's portal创建一个专用的app。

应用建好后,会收到两个关键字:一个client id和一个client secret。

ws模块的web socket 。首先要安装node js。然后,创建ws_server文件夹,然后使用包管理器(npm)安装ws包。
该代码将在 NodeJS 中创建一个简单的回显服务器,以将我们的消息回显到我们的 QML 客户端。

cd ws_server
npm install ws
应用建好后,会收到两个关键字:一个
client id和一个client secret。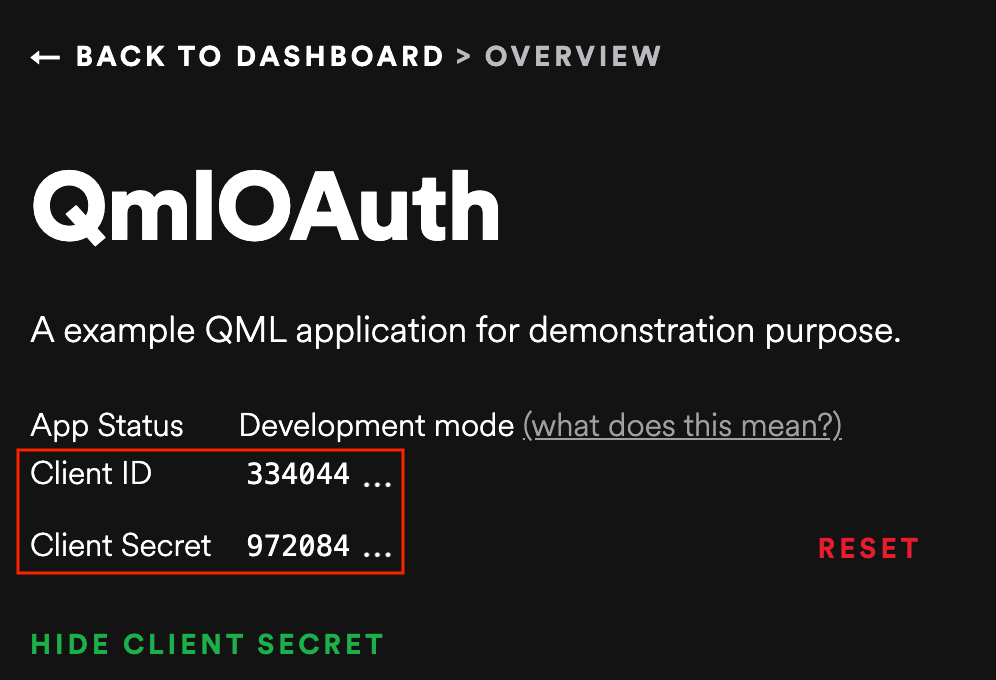
ws模块的web socket 。首先要安装node js。然后,创建ws_server文件夹,然后使用包管理器(npm)安装ws包。
该代码将在 NodeJS 中创建一个简单的回显服务器,以将我们的消息回显到我们的 QML 客户端。
cd ws_server
npm install ws
cd ws_server
npm install wsnpm工具在本地文件夹下载并安装ws包,以及其它相关依赖的包。
server.js文件将成我们的服务器端实现文件。服务端代码将在端口3000,创建一个web socket服务,并监听接入的请求。当一个连接接入时,它会发现一段致意,并等待客户端信息。通过socket发送的每个客户端信息将会被发回到客户端。
const WebSocketServer = require('ws').Server

const server = new WebSocketServer({ port : 3000 })

server.on('connection', function(socket) {
	console.log('client connected')
	socket.on('message', function(msg) {
		console.log('Message: %s', msg)
		socket.send(msg.toString())
	});
	socket.send('Welcome to Awesome Chat')
});

console.log('listening on port ' + server.options.port)
你要适应JavaScript的写法和回调函数。
WS Client
在客户端我们需要一个列表视图来显示消息,还需要一个TextInput来接收用户输入的聊天信息。
我们将在示例中使用白色标签。
// Label.qml
import QtQuick

Text {
    color: '#fff'
    horizontalAlignment: Text.AlignLeft
    verticalAlignment: Text.AlignVCenter
}聊天视图是个列表视图,文本信息会被添加到列表模型。每个信息条目将是行号前辍加上消息label。我们使用单元格宽度cw因子将with拆分为24列。
// ChatView.qml
import QtQuick

ListView {
    id: root
    width: 100
    height: 62

    model: ListModel {}

    function append(prefix, message) {
        model.append({prefix: prefix, message: message})
    }

    delegate: Row {
        id: delegate

        required property var model
        property real cw: width / 24

        width: root.width
        height: 18

        Label {
            width: delegate.cw * 1
            height: parent.height
            text: delegate.model.prefix
        }

        Label {
            width: delegate.cw * 23
            height: parent.height
            text: delegate.model.message
        }
    }
}
聊天输入框是在简单的文本框外围加上了颜色边框。
// ChatInput.qml
import QtQuick

FocusScope {
    id: root

    property alias text: input.text
    signal accepted(string text)

    width: 240
    height: 32

    Rectangle {
        anchors.fill: parent
        color: '#000'
        border.color: '#fff'
        border.width: 2
    }

    TextInput {
        id: input
        anchors.left: parent.left
        anchors.right: parent.right
        anchors.verticalCenter: parent.verticalCenter
        anchors.leftMargin: 4
        anchors.rightMargin: 4
        color: '#fff'
        focus: true
        onAccepted: function () {
            root.accepted(text)
        }
    }
}
当web socket接收到消息后,它将消息添加到聊天的视图列表。状态变更时也同样处理。此外,当用户输入聊天消息时,副本会附加到客户端的聊天视图中,并将消息发送到服务器。
// ws_client.qml
import QtQuick
import QtWebSockets

Rectangle {
    width: 360
    height: 360
    color: '#000'

    ChatView {
        id: box
        anchors.left: parent.left
        anchors.right: parent.right
        anchors.top: parent.top
        anchors.bottom: input.top
    }

    ChatInput {
        id: input
        anchors.left: parent.left
        anchors.right: parent.right
        anchors.bottom: parent.bottom
        focus: true

        onAccepted: function(text) {
            print('send message: ' + text)
            socket.sendTextMessage(text)
            box.append('>', text)
            text = ''
        }
    }

    WebSocket {
        id: socket

        url: "ws://localhost:3000"
        active: true

        onTextMessageReceived: function (message) {
            box.append('<', message)
        }

        onStatusChanged: {
            if (socket.status == WebSocket.Error) {
                box.append('#', 'socket error ' + socket.errorString)
            } else if (socket.status == WebSocket.Open) {
                box.append('#', 'socket open')
            } else if (socket.status == WebSocket.Closed) {
                box.append('#', 'socket closed')
            }
        }
    }
}
先要运行服务端再运行客户端。这个简例中没有重连机制。
运行服务端
cd ws_server
node server.js
运行客户端
cd ws_client
qml ws_client.qml
当输入文本并按下回车时,将会看到类似如下信息。
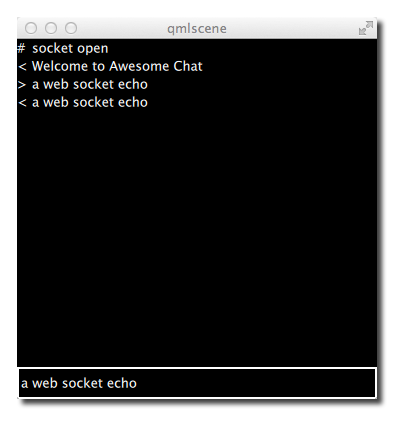
总结
关于QML网络的这一章到此结束。请记住,Qt在原生的部分相比QML这部分有更丰富的网络API。但本章的重点是放在QML网络,以及如何与云服务集成的部分。